Load Balancing in Java Web Application Example
Load balancing improves the distribution of workloads across multiple Tomcat servers. Load balancing aims to optimize resource use, maximize throughput, minimize response time, and avoid overload of any single resource.
A Tomcat cluster consists of a set of connected Tomcat Servers that work together so that, in many respects, they can be viewed as a single system. Each node, sets to perform the same task, controlled and scheduled by load balancer.
1. The tools
- Java JDK
- Apache Tomcat
- Apache httpd server
- mod_jk connector
2. Introduction
In this example, we are going to set up your own Apache Tomcat clusters using Apache Httpd as a load balancer front end for the cluster.
3. Prerequisites
- JDK installed
4. Download Tomcat
Go to the page https://tomcat.apache.org/download-80.cgi and download the tomcat server as a zip compressed file for windows.
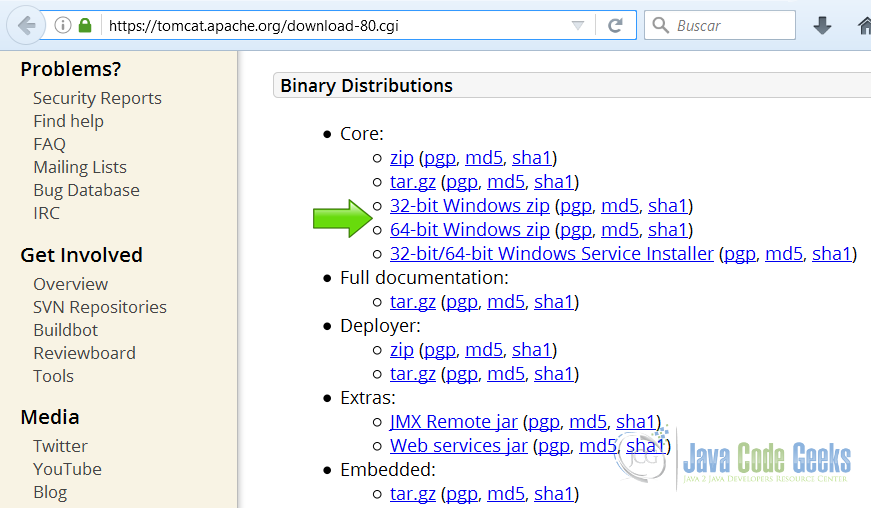
1 Download Tomcat for Windows
5. Download Apache httpd server
Go to the page http://www.apachehaus.com/cgi-bin/download.plx and download the httpd server as a zip compressed file for windows.
The Apache foundation doesn't provide binaries for the httpd server. We are going to use a binary distribution from the recommended sites in the Apache web site.
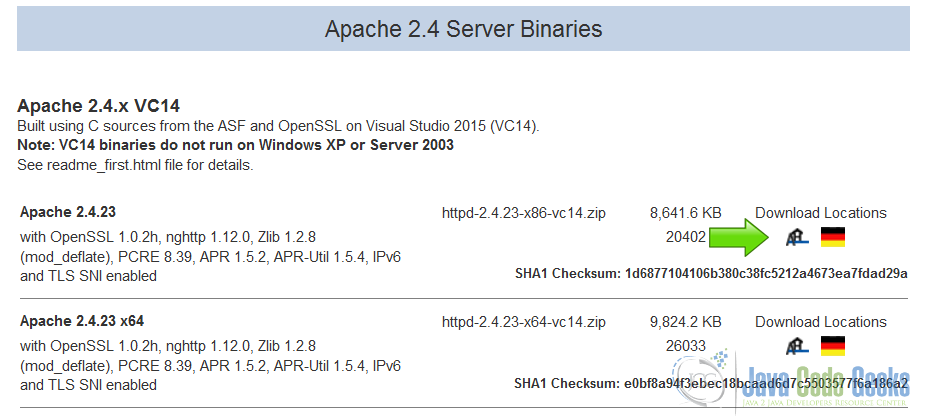
2 download httpd server
6. Download mod_jk
Go to the page https://www.apache.org/dist/tomcat/tomcat-connectors/jk/binaries/windows/ and download the mod_jk as a zip compressed file for windows.
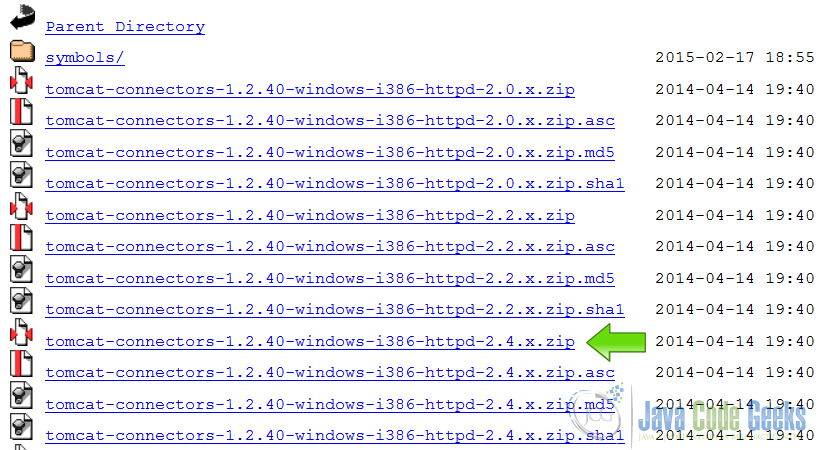
3 download mod_jk conector
7. Tomcat Installation
7.1 Uncompress Apache Tomcat
Choose an installation directory and uncompress the Tomcat server in its own directory.
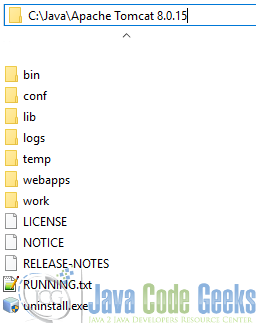
4 Uncompress Tomcat
7.2 Install the Tomcat service
Open the Windows terminal and go to the Tomcat Installation bin directory.
Tomcat installation directory
C:\Java\Apache Tomcat 8.0.15\bin>
Install the service with the following command:
Install Tomcat service
C:\Java\Apache Tomcat 8.0.15\bin>service install
You should get an output similar to this:
install Tomcat output
Installing the service 'Tomcat8' ... Using CATALINA_HOME: "C:\Java\Apache Tomcat 8.0.15" Using CATALINA_BASE: "C:\Java\Apache Tomcat 8.0.15" Using JAVA_HOME: "C:\Java\jdk1.8.0_40" Using JRE_HOME: "C:\Java\jre1.8.0_40" Using JVM: "C:\Java\jre1.8.0_40\bin\client\jvm.dll" The service 'Tomcat8' has been installed.
7.3 Start the Tomcat service
Start the service with the following command:
Start tomcat output
C:\Java\Apache Tomcat 8.0.15\bin>sc start Tomcat8
You should get an output similar to the following:
console
SERVICE_NAME: Tomcat8 TYPE : 10 WIN32_OWN_PROCESS STATUS : 2 START_PENDING (NOT_STOPPABLE, NOT_PAUSABLE, IGNORES_SHUTDOWN) WIN32_OUTPUT_CODE : 0 (0x0) SERVICE_OUTPUT_CODE: 0 (0x0) CHECK-POINT : 0x0 START-INDICATOR : 0x7d0 PID : 5552 MARKS :
7.4 Check that tomcat is running
Open the browser in the URL: http://localhost:8080
And you should see the Tomcat Welcome screen.
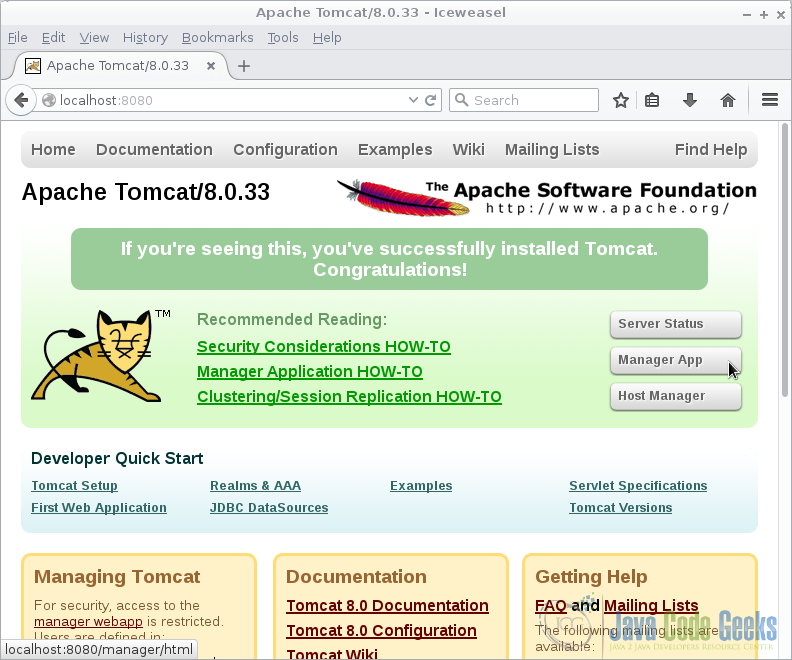
5 Tomcat Welcome
8. Apache httpd Installation
8.1 Uncompress Apache httpd server
Choose a directory and uncompress the Apache httpd server.
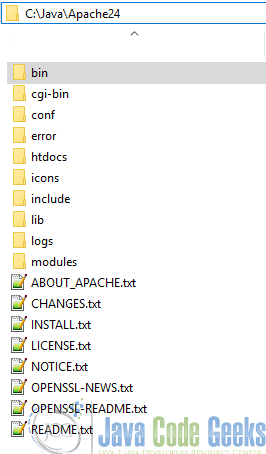
6 Uncompress Apache httpd server
8.2 Edit the server root
Before we run the Apache httpd server we need to tell Apache where is the server root. Open the httpd server configuration file and edit the SRVROOT parameter using the appropriate directory.
SRVROOT
Define SRVROOT "C:\Java\Apache24"
8.3 Install the httpd service
Open the Windows terminal and go to the httpd server Installation bin directory.
httpd server bin installation directory
C:\Java\Apache24\bin>
Install the service with the following command:
Install httpd server service
C:\Java\Apache24\bin>httpd -k install
You should get an output similar to this:
install Tomcat output
Installing the 'Apache2.4' service The 'Apache2.4' service is successfully installed. Testing httpd.conf.... Errors reported here must be corrected before the service can be started.
8.4 Start the Tomcat service
Start the service with the following command:
Start tomcat output
C:\Java\Apache24\bin>sc start Apache2.4
You should get an output similar to the following:
console
SERVICE_NAME: Apache2.4 TYPE : 10 WIN32_OWN_PROCESS STATUS : 2 START_PENDING (NOT_STOPPABLE, NOT_PAUSABLE, IGNORES_SHUTDOWN) WIN32_OUTPUT_CODE : 0 (0x0) SERVICE_OUTPUT_CODE: 0 (0x0) CHECK-POINT : 0x0 START-INDICATOR : 0x7d0 PID : 3268 MARKS :
8.5 Check that tomcat is running
Open the browser in the URL: localhost and you should see the httpd server Welcome screen.

7 Apache httpd server welcome screen
9. mod_jk installation
Extract the mod_jk compressed file and copy the file mod_jk.so into the httpd server modules directory.
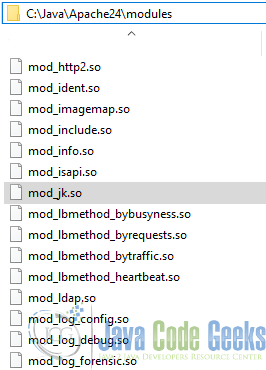
8 Install mod_jk
9.1 Add mod_jk to the httpd.conf
Edit the httpd.conf file.

9 Edit httpd
Add the following line to load the connector.
Load mod_jk
LoadModule jk_module modules/mod_jk.so
9.2 Configure mod_jk in the Apache httpd server
We are going to configure the mod_jk to work with our Apache httpd server. Add the following lines to the httpd.conf
Configure mod_jk
JkWorkersFile C:\Java\Apache24\conf\workers.properties JkShmFile C:\Java\Apache24\log\mod_jk.shm JkLogFile C:\Java\Apache24\log\mod_jk.log JkLogLevel error JkMount /status status JkMount /* balancer
JkWorkersFile C:\Java\Apache24\conf\workers.properties.In this file we define the Tomcat workers.
JkShmFile C:\Java\Apache24\log\mod_jk.shmDefines where is the jk_mod shared memory file.
JkLogFile C:\Java\Apache24\log\mod_jk.logDefines where are the mod_jk log file.
JkLogLevel errorSets the error level of the mod_jk.
JkMount /status statusMaps a worker to the status worker.
JkMount /* balancerMounts the Tomcat balancer
9.3 Create the workers.properties file
In the conf directory of the Apache httpd server, create a new text file with the name workers.properties
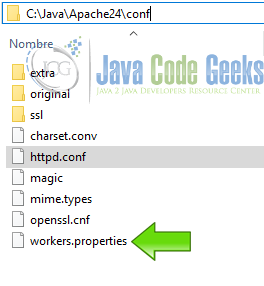
10 Create workers.properties
Edit the worker.properties file and put the following lines:
Workers properties
worker.list=balancer,status worker.tomcat1.type=ajp13 worker.tomcat1.port=8009 worker.tomcat1.host=localhost worker.tomcat2.type=ajp13 worker.tomcat2.port=8010 worker.tomcat2.host=localhost worker.tomcat3.type=ajp13 worker.tomcat3.port=8011 worker.tomcat3.host=localhost worker.balancer.type=lb worker.balancer.balance_workers=tomcat1,tomcat2,tomcat3 worker.status.type=status
worker.list=balancer,statFrom outside we have 2 visible workers: balancer and stat. All the request that comes to the balancer are managed by the balancer worker.
worker.tomcat1.type=ajp13Defines a native connector to use with the Tomcat instance, is the same for each worker.
worker.tomcat1.host=localhostSets the host of the worker, this is done for each worker.
worker.tomcat1.port=8009Sets the port of each worker.
worker.balancer.type=lbLoad Balancing Workers: Do not show workers of type "lb"
worker.balancer.balance_workers=tomcat1,tomcat2,tomcat3Adds the workers to the load balancer
worker.status.type=statusThe status worker will log changes made to the configuration with log level "info" to the usual JK log file. Invalid requests will be logged with log level "warn".
At this point the Apache httpd server its working as a front end of the Tomcat load balancer.
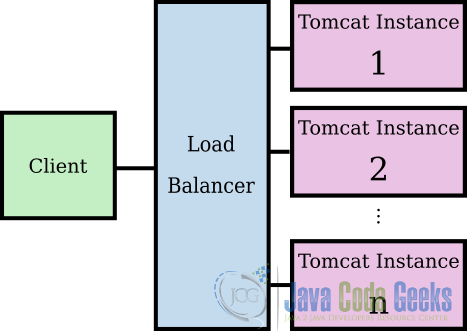
11 Tomcat load balancing
10. Conclusion
When you access the Httpd server from the browser, each request is going to be distributed to the three tomcat instances. If one of the tomcat instances fail then load balancer stops to forward requests to that failed instance.
If that failed instance becomes active then the load balancer adds it to the cluster and forward requests again. The key here is that you make each node of the load balancer a different Tomcat server from a separate host.
thompsonhattp1998.blogspot.com
Source: https://examples.javacodegeeks.com/enterprise-java/tomcat/apache-tomcat-load-balancing-tutorial/
Post a Comment for "Load Balancing in Java Web Application Example"